Nouvelle version (0.18) du module Webmin de gestion de l'antivirus ClamAV.
Migration progressive de certains mes projets vers GitHub.
C'est fait pour wbmclamav !
Just like the schedule said, GNOME 3.12 was released today, and of course it's our best release ever — honest, you can really feel the whole GNOME 3 experience maturity. I've been quite busy in other projects in the recent months, and couldn't participate as much as I wanted but I nevertheless have a few perspectives to share, and people to thank.
Foremost the release team, from that point of view, the landing was particularly soft, with very few freeze break requests which is a good sign. Hat tip to Matthias for the handling of .0, and all the blog posts he has been writing detailing the changes.
For the French translation team, where my part is quite small — mostly I attended Le Translathon and provided a few screenshots for the release notes — this also looks like a nice release, especially as new participants joined the team.
Last but not least the documentation team really kicked ass this cycle.
This is just three teams, they're parts of a big project, so I couldn't end it without thanking all other teams and persons, from developers to testers, from designers to users, from the foundation board to the engagement team, GNOME is the sum of us all.
Let's celebrate.
It's already the last day of the winter documentation hackfest in Norwich (pronounced like Porridge), tomorrow we'll drive to Brussels, for FOSDEM, and here comes a second report of my activities.
On Tuesday, after the work on git stable updates (see last post), I concentrated on various speed improvements, including a small change to our own local configuration that makes wonder (it had an hack to use XSL files from a local yelp-xsl copy but that broke some timestamping, and caused some modules to be rebuilt endlessly). In normal operation a full build of help.gnome.org is now about ten minutes.
Kat had made a request to have application icons displayed in the index pages, as they are now included in Mallard documentation titles. I started that on Wednesday and it went easier than expected, the pages indeed look nicer now.
The other important part of Wednesday was a request from Petr, to get the getting started pages integrated on the web site. The particular thing about the gnome-getting-started-docs module is that it installs pages to an existing document (gnome-help), making use of Mallard generated indexes and links to provide an integrated document. Unfortunately that operation mode didn't go well with the code, as it handled tarballs one after the other and was rather confused when another document with the same name, but no index page, came in. It required quite a lot of changes, and I'm not happy about all of them as there's quite a bit of code duplication and some hardcoded parts, but at the end of the day it was working, and you can now go and view the Getting Started material on the web site.
For the last day I switched to the developer docs, and as I looked at Allan's notes and thought about a way forward, I went back to the code and discovered I added the possibility to import documentation from wiki pages almost three years ago, during the 3.0 hackfest in Bangalore... It seemed like a good fit for the serie of "How Do I" pages mostly created by Ryan and Matthias so I refreshed the code and voila! the pages got on the Guides page.
During the last year or so many elements were removed from the frontpage, first the platform grid, then the "10 minutes tutorial" carousel, but that left the page quite empty. To wrap up the week, I have now used that extra space to provide direct access to more of the internal indexes.
And that's what I did during the hackfest. I already gave thanks but here they are again, Kat & Dave, the UEA, the foundation, the participants and visitors.
This is hackfest week, it's been a long time. I arrived in Norwich Saturday evening, after almost three hours in London Liverpool Street Station looking at trains being announced delayed, then cancelled, one after the other. Storms, trees, and powerlines do not mix well.
As there's FOSDEM next weekend, the hackfest was set to start on the Sunday, and it was well spent, triaging and fixing developer.gnome.org and help.gnome.org bugs, I forgot to take note of the number of bugs when I started, but each module got down to below 20. And what's especially nice is that many of the bugs I reassigned to other modules quickly got fixed (Dave at the hackfest handled them for gnome-devel-docs).
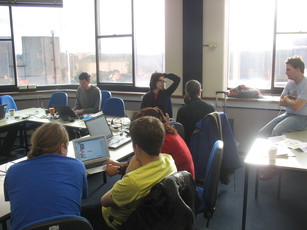
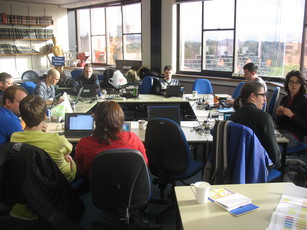
On Monday we got to the UEA School of Computing Sciences (thanks for having us), and I started the day presenting the code running both websites to Martin Packman. Then I went on adding support for the no-lc-dist flag that had been added to yelp-tools. It's a new feature that has not yet been advertised because using it meant translations wouldn't work on help.gnome.org. But that's over and modules can start using it, it will mean smaller tarballs and faster 'make distcheck', as only the .po file will have to be added to the tarballs.
January 28th 2014
Later that day I took a detour from documentation to ponder some health check for GNOME applications, I copied some metrics from Andre's "Indicators for Missing Maintainership in Collaborative Open Source Projects" paper, and wrote some code to aggregate data from jhbuild modulesets, doap files, and git logs. I pushed my work-in-progress to people.gnome.org/~fpeters/health/.
And here we are on Tuesday, and feature of the day is the possibility to have stable documents directly updated from git branches. This is nice for the documentation team as that won't require maintainers to publish new tarballs to get documentation changes on the websites, and for the same reason it will also be great for translators. It has become quite more useful to continue on translating documentation even after scheduled GNOME releases.
This is all technical stuff but an hackfest is not limited to that, and thanks to Kat and Dave for organizing it (and the hosting, and the breakfasts, many thanks), other participants, and the GNOME foundation for its sponsorship, it's been great days, and surely the remaining days will be as productive. And then it will be back to Brussels, and FOSDEM...
And I wasn't there, but that has nothing to do with GNOME, just that it conflicted with another important project I had for almost a year, Radio Roulotte and a recurring one, Radio Esperanzah!.
The idea of Radio Roulotte mostly came last year, it was about getting a caravan and two horses, to visit various villages, meet locals and produce a radio show with them. We were a small team to talk about it, and then preparing it, getting new contacts, requesting some money, reshaping the caravan, etc. but it only became real when we met and the horses arrived.
And the days were cut in two parts, travelling in the morning...
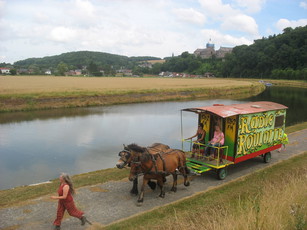
Road from Buzet to Soye, July 27th
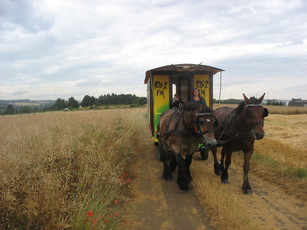
Road from Floreffe to Buzet, July 26th
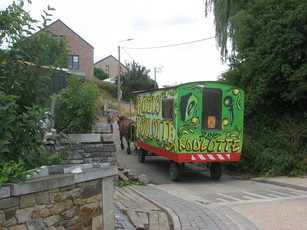
In the streets of Floriffoux, July 28th
... then assembling the studio, and that meant getting stuff out of the caravan, getting other stuff in, including electrical power, calibrating the satellite dish, etc.

In Soye, July 27th
All of this to get ready at 6pm to produce one hour of radio, live with locals.
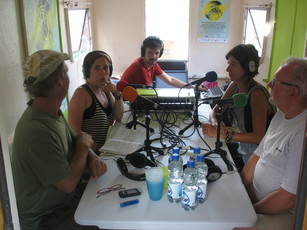
Studio in Floreffe, July 25th
Studio in Soye, July 27th
Studio in Floriffoux, July 28th (outside for the last one)
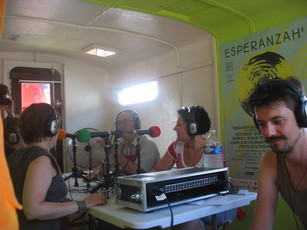
And as quickly as it started the week was over, we said goodbye to some team members, took a day almost off, and started welcoming members of the radio Esperanzah! team. That project is well oiled, it was the 10th time it happened, it's about covering the various parts of the Esperanzah! music festival.
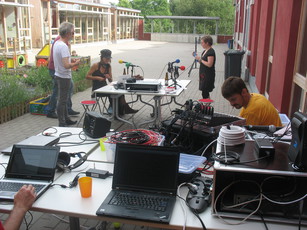
So we went and assembled things again, the studio as well as our work room, the FM transmitter and computers below the stages to record the concerts.
Hardware below a stage
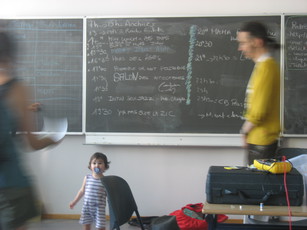
One day schedule on the board
The festival started, and we kept working, presenting the daily programs, interviewing artists and other participants, recording in the alleys...
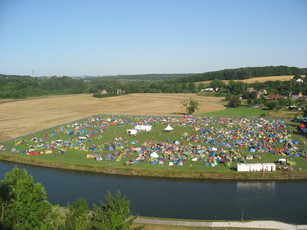
Esperanzah Camping filling up
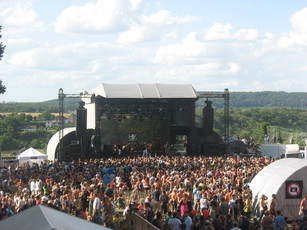
A concert on the stage
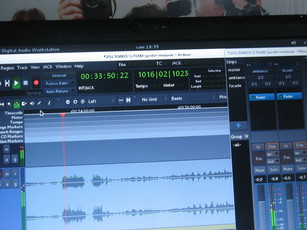
And for my part, mixing the concerts, so we could broadcast one on the evening and offer them to the artists. For the first time I did it with Ardour 3 (a git snapshot actually, 44fc92c3) and it went beautifully.
My horizon for three days
As usual I only attended a few concerts, but at least I got to see An Pierlé and Asian Dub Foundation.
So here you are, you now know what I did during your GUADEC. I heard many good things about Brno, let's work now to get 3.10 rocking in Septembre; and see you in Strasbourg for next GUADEC.
Long time without any activity here, and more generally less time with computers those past months, even though I visited Lyon for the JDLL in November and I was of course present in Brussels for the FOSDEM and the developer experience hackfest that happened just before. (I didn't write about it but it was totally unexpected for me to find myself there with two other motivated devhelp developers, many thanks to Aleksander and Thomas.)
But I am now finally back in action, installed in my new place, and for the occasion here are some pictures, starting perhaps with the most raw moment, after a few weeks:
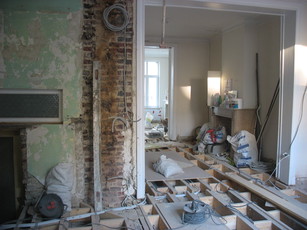
Walls and flooring removed, October 2012
I kept my other flat for a few months but had to let it go by December, and by chance my new upstairs neighbour offered me her spare bedroom, as well as her attic to store my boxes (thanks Fleur!). Still it kept for longer than expected and I became quite impatient of settling in my new place, and that finally happened ~10 days ago.
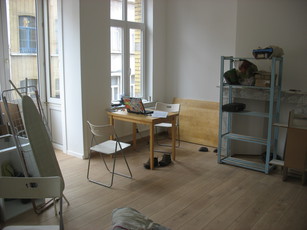
Temporary office space
The packing boxes left the attic but most of them are still unopened.
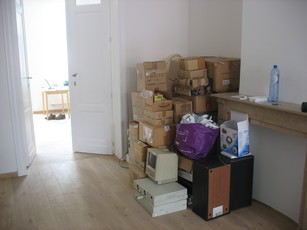
Packing boxes moved to the future living room
The kitchen is almost done, not shown in the picture: a fridge is still missing.
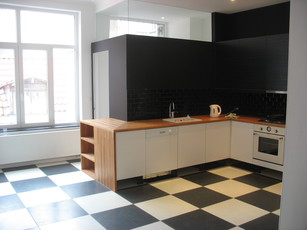
Black and white kitchen
And I have the most fabulous bathroom.
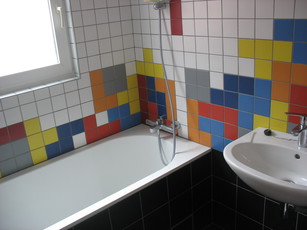
Tetris bathroom
Thanks to my good friend Macha for the architect work she did, it's that nice because she always had the eyes on the smallest details.
For quite some time the access to recent files has been put forward in GNOME, it happened even more so in 3.6 with a "Recent Files" view in Files (née Nautilus), that makes use of a new recent files backend in gvfs.
This is all very nice but my daily activities still involve a lot of command line usage, and I didn't find any way to mark as recents the files I receive via mutt, the text files I create in vim, the pictures I resize with ImageMagick, etc. That always bothered me at the moment I wanted to access those files, but then I just copied a copy of the file to a scratch directory I had bookmarked, and went on with my work.
Until yesterday, as I finally decided to fix that, and quickly put together recent, a command line utility that just puts the file it gets as argument in the recent files list. It's very simple, uses GFile and GtkRecentManager, and the code is located there: recent.c. It's so simple I guess many others wrote something similar, but here you have, perhaps it will be useful.

On Wednesday GNOME 3.6 has been released; many thanks to all people involved, this release is definitely a great one. And then today it was my turn to be released, many thanks for the kind words (and phone calls, and visits).
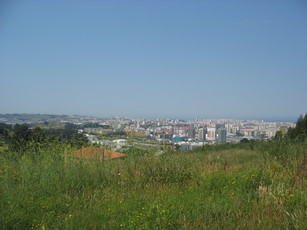
A Coruña, 25 juillet 2012.
À peine atterri du GUADEC, empaqueté un nouveau sac; à peine un détour par Bruxelles, pris un train; à peine arrivé à Floreffe, la vie non-stop, une fantastique équipée, merci toutes, tous.
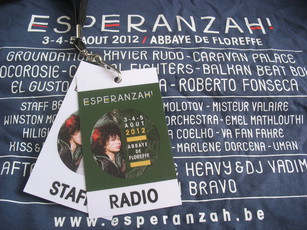
Mémoires de Radio Esperanzah! 2012
Et puis déjà le retour, à Bruxelles et au travail, entre côtes d'agneau et bord de canal (en hauts), entre zoning industriel et entrepôt désaffecté (en bas), une semaine toute drôle.
Mais pour la terminer, un retour par GNOME, 201ème commit digest et 40 bugs corrigés dans le produit "website".
GUADEC is now over but I still have a few long days ahead as I packed a new bag as soon as soon as I got home, this time the direction is Floreffe in the belgian countryside to help in the ephemeral radio station we install every year during the Esperanzah! music festival.
Everything is now ready and we still have a few hours before the doors open so here I am, writing my own take on the time spent in A Coruña.
After an uneventful flight and the preregistration event, we at the release team had a meeting during lunch on Thursday where we discussed our usual stuff, and a little bit about the report we would give during the foundation AGM. It was planned to be the usual report, "we released 3.2 and 3.4, they were on time, we also did this and that…" but we changed it after the many discussions we all had, about Xan and Juan José "a bright future for GNOME" talk, about Benjamin "staring into the abyss" blog post. It seemed like the air was full of expectations regarding the release team, often beyond our actual attributions.
That's why, to go past the informal discussions, we changed our AGM presentation to bring the question upfront, to all foundation members: "what do you expect of the release team?". I am quite happy about the way it went, many opinions were heard during the AGM, even if we had to stop the discussion to leave room to other teams and members.
But we continued gathering feedback and it all fueled the "GNOME OS" BoF on Monday. While the morning was hept on technical grounds (application sandboxing, OSTree…), the afternoon turned into a very interesting conversation on priorities and targets. From form factors we should target (laptops but taking touch into consideration) to core applications, I believe we laid out the foundations for a solid planning. It will now have to be discussed further, and with community members that couldn't attend GUADEC and that BoF. More on that soon, on desktop devel list.
And GUADEC was then fast over, as a all it felt like we started with many doubts but shaked them out and ended with strenghtened confidence in the project, something that will be necessary to keep it going strong.
Others have written about the food, the parties, the games, and all other community bonding moments, I won't repeat team, I share their sentiments, it has been a great event, and I give all my thanks to the organizers and local team, and of course to the foundation who sponsored me, thank you all!
Long time no post, I should really have had something up for 3.4.0, and that was of course the plan but on short notice I went to Vientiane, Laos, for $dayjob, the week of the release. Timezone difference, internet connection at the hostel, and a busy schedule made it quite impossible to participate in the release. I didn't stay long but I had a really good time there, thanks again Chanesakhone and Jean Christophe.

Vientiane, Laos, March 25th 2012
Then, back in Brussels I had to spend time on my new apartement, various administrative tasks, arranging things for gas, electricity and water, keeping an eye on the roof where workers had to knock a chimney down, discussing plans with an architect friend, and so on.
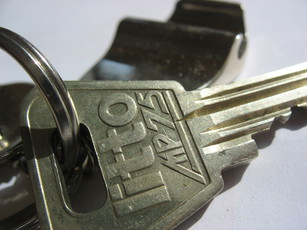
Keys for my new apartment (and a Collabora bottle opener)
Things finally settled down and two releases have now consecutively been done; 3.4.1 brought some important fixes, and improvements in accessibility, translations and documentation; then last week 3.5 opened the path to 3.6. A new adventure begins…
Top départ à 10h17, on se voit, dernières marches de l'escalator, on se dira bonjour plus tard, on sprinte ! 10h18, heure officielle de départ du train. 10h19, arrivée sur le quai, il est toujours là, on saute dedans. On souffle.
Lille. Puis Dunkerque. Retrouver et rencontrer des personnes, se perdre dans les habits, tenter mille combinaisons, se maquiller, sortir.
Carnaval.
Lignes. Chahuts. Harengs. Rigodon.
Le lendemain se balader, retraverser la frontière, La Panne, saluer tout le monde, rater un train, courir à Gand, arriver à Bruxelles, passer encore du temps ensemble, attraper le dernier métro.
Moments qui seront chéris. N.
After several months on hiatus, then some January evenings to process the backlog, I am happy to have the commit digests back to the present day.
What now? I'll try to get back to the weekly updates, whatever the weather.
Of course you can help; whenever you see a noteworthy commit, whenever you make a noteworthy commit, just send me an email, or ping me on IRC, this will help me, and could also bring other perspectives on what constitutes a “noteworthy” commit. And if you love the commit digests, if you have time on your hands, you can help extending the projects to new heights, got an interest in statistics? got an interest in interviews? there's a place for you.
Happy reading!
À trainer à gauche à droite j'ai forcément lu quelques bilans 2011, je passe mon tour (dyslexique j'aurais écrit « je passe mon trou » et ça nous aurait fait rire un peu) mais je m'étais dit que dans mon billet sur Montréal (ses gens, ses bars, la casa del popolo) j'aurais une place pour les lectures, et ce billet, il n'arrivera pas, tant pis pour les photos, mais quand même, bilans 2011, listes de lecture, prétexte et phrase trop longue.
Capitalisme, désir et servitude, de Frédéric Lordon. Énorme. Oublié dans l'avion au retour, à nouveau acheté lors des emplettes de Noël pour en lire les dernières pages. Sous-titré « Marx et Spinoza ». Et de ce dernier, la mise en exergue de cette phrase, « Par réalité et par perfection, j'entends la même chose », qui est quand même la phrase illico recopiée lors de ma lecture de l'Éthique…
Un livre, beaucoup(?) d'autres, et après avoir lu De onze à douze je me suis motivé à enfin faire l'inventaire de ma bibliothèque (en sous-texte il y a la perspective d'un déménagement…), goodreads, quelques soirées d'encodage, bien sûr ponctuées d'écroulages de piles, mais en sortie, enfin, un tableau. Et un tas de statistiques amusantes à faire. Une autre fois.
Et pour finir dans le sous-texte, première lecture de l'année.
C'était ce week-end, journées du logiciel libre à Lyon, c'était le week-end dernier, Ubuntu Party à Paris, c'était il y a déjà plus d'un mois, Montréal, c'était il y a, oh, cinq mois… déjà.
C'était, calibré, rythme de six mois, Ubuntu Party à Paris; c'était, rythme d'un an, JDLL l'année dernière, et voilà donc qu'il y a maintenant plus d'un an j'étais ainsi, assis, sur les pentes d'une croix rousse, à discuter, à ne pas savoir. Entre… et …
Pour, aujourd'hui, une question en moins. Mais je ne sais quoi.
The date came late, and it was definitely not at the best time wrt some projets at work, but I decided to go nevertheless, and have to give my thanks to the GNOME Foundation, and the travel committee, for quickly accepting when I asked for sponsorship.
Probably because of the short notice it felt like some important teams didn't have enough representation, and while this gave ample place for some topics (building gnome!) I wish we had enough teams for a roundup of the different aspects of GNOME. On the positive side this wide cooperation is happening in the mailing list discussion on freezes, with translators, documentation team, release team and other interested parties.
Still, back to Montreal and the summit, I spent much of the first day testing and reviewing jhbuild patches, and wrapping the day with the presentation of Baserock by Lars Wirzenius. The second day was more diverse, and more intense, with (I heard) a very interesting discussion on GNOME strategy (Tiffany wrote about it in details) that happened at the same time as a jhbuild (and more) session lead by Colin, and later in the afternoon a good serie of questions asked by Xan about our (lack of a clear) developer platform.
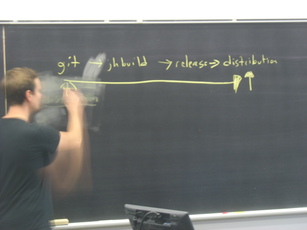
Colin on JHBuild
And the Collabora party, of course.
Then on Monday, more patch reviews, including (at last) Bug 654872 - Delete no longer shipped files at install time but the day was short as many people had to leave early, so it ended with random hacking and bug filing, with the good luck of hitting a bug in glib-networking with Nicolas Dufresne sitting just behind.
All in all this was my first summit and it went well, it would sure benefit from some earlier planning (both dates, and sessions), but this was a nice chance to see new heads (and known heads, of course), especially as I was not in Berlin this summer.
Last updated:
July 02, 2025 12:15 AM
All times are UTC.
Powered by:
![]()
Feeds:
![]()
![]()